Run A Customized Python Package Inside of Jupyter on Docker
Why Docker?
To simplify, for your code to work on other machines, on clouds (e.g AWS, Google) or on data center where the system setup might be different from yours, putting the software inside of an isolated environment (called “Container” by Docker) is the way to go. Container reduces complexity and speed up development cycle.
The official docker page has more detailed info on why it matters.
Goal
I want to test python package I wrote in Jupyter lab inside of Docker, it seems like a straightforward task. But rarely people have written about it - most blog posts were on how to run python app in Docker, or how to run Jupyter lab in docker but not how to install a customized package in docker and run it in Jupyter Lab. There are still many hidden obstacles to achieve this goal.
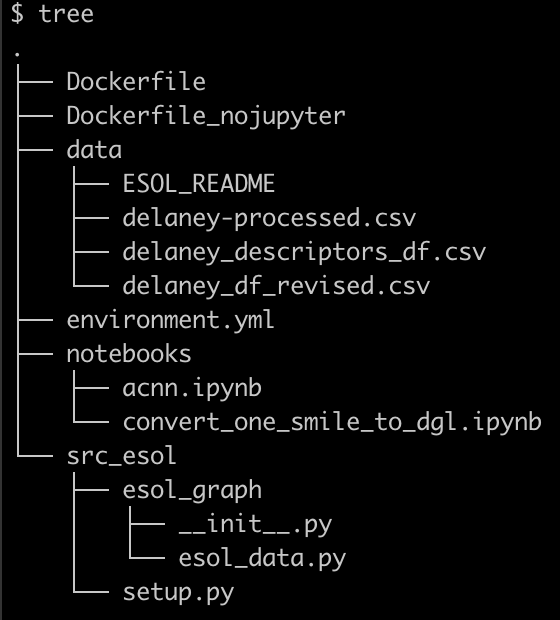
My code is organized in a following structure, I want to build a docker container that starts a Jupyter Lab session to test my notebook which uses customized functions from the src_esol folder. The data used for this test can be huge so ideally I want to be able to mount any external data.
The goal above can be dissected in the following steps:
- Make sure a Jupyter Lab session can be run locally with the customized environment.
- Make sure a specific environment (e.g
pandas,torch) can be run within Docker in Python. - Make sure (2) can be run with customized functions (e.g a function in
src_esol/esol_graph/esol_data.pycan be successfully imported) . - Make sure (3) can be run with Jupyter Lab inside of Docker.
- Make sure (4) can be run with mounted data.
(1) is working, moving on to (2,3,4,5).
Workflow
1. Make a Dockerfile
All the information of a software including environment, executables, and associated meta data can be stored in a docker image. A Dockerfile is a file that contains the instruction to build a Docker image.
Docker builds an image based on order it is written in a Dockerfile. Each command creates a cacheable layer when the image is built, the layers could be reused if the order of the instructions are the same between two versions of Dockerfiles. To increase the speed of the build and save space, the order matters and one usually puts static and memory costly instructions in the beginning of the Dockerfile and dynamic instructions that would not take too much time to run in the bottom part of the docker file. See best practices from Docker official page and by Alvaro Iradier.
To achieve (2), I had many trials and errors in understanding how Docker works. One big challenge I got was not being able to activate conda environment. I googled around and found a good tutorial by Itamar Turner-Trauring.
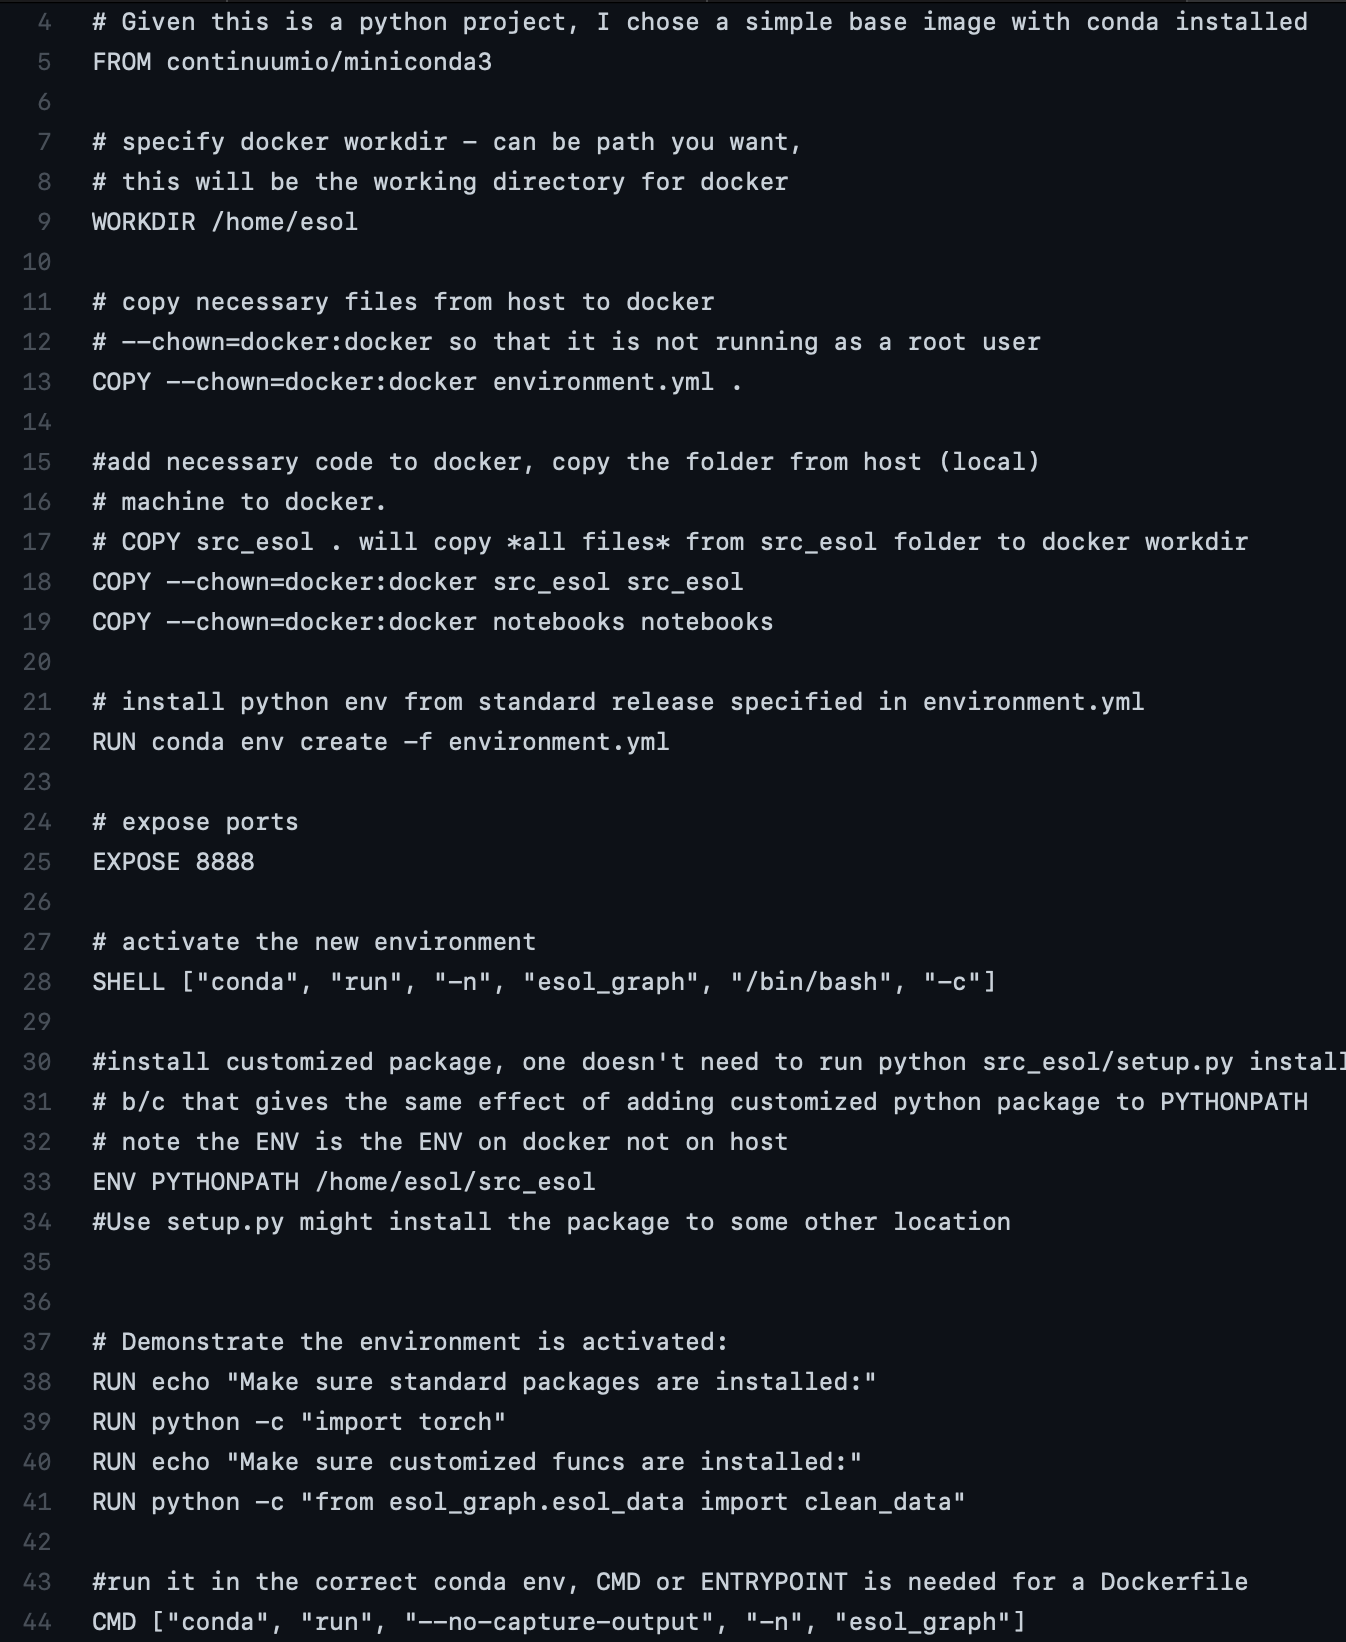
To achieve (3), another difficulty I found is not being able to correctly install customized Python package. This means I cannot properly import the clean_data function in src_esol/esol_graph/esol_data.py. Instead of using setup.py to install my own functions to somewhere, I chose to append my executables to PYTHONPATH which does the same thing.
Here is a working version for (3), code for Dockerfile_nojupyter
After running docker build -t esol_graph_nojupyter . -f Dockerfile_nojupyter
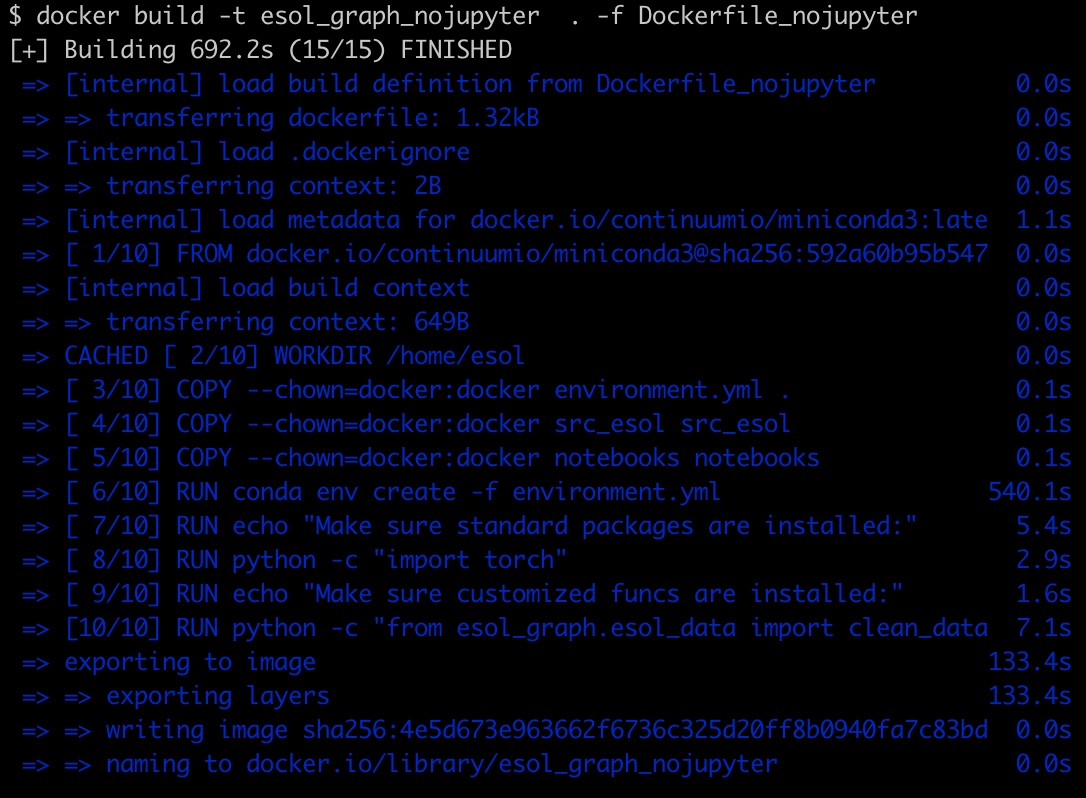
Volia!
To achieve (4), if one simple replaces the CMD line above to CMD ["jupyter", "lab", "--allow-root", "--ip='*'"], it won’t work since jupyter needs to be run inside of the conda env. Note that even if a Docker image can be built successfully, it doesn’t mean a Docker container could be run based on the image successfully. --ip='*' is needed for jupyter to bind to any interface (see here).
Here is a working image for (4).
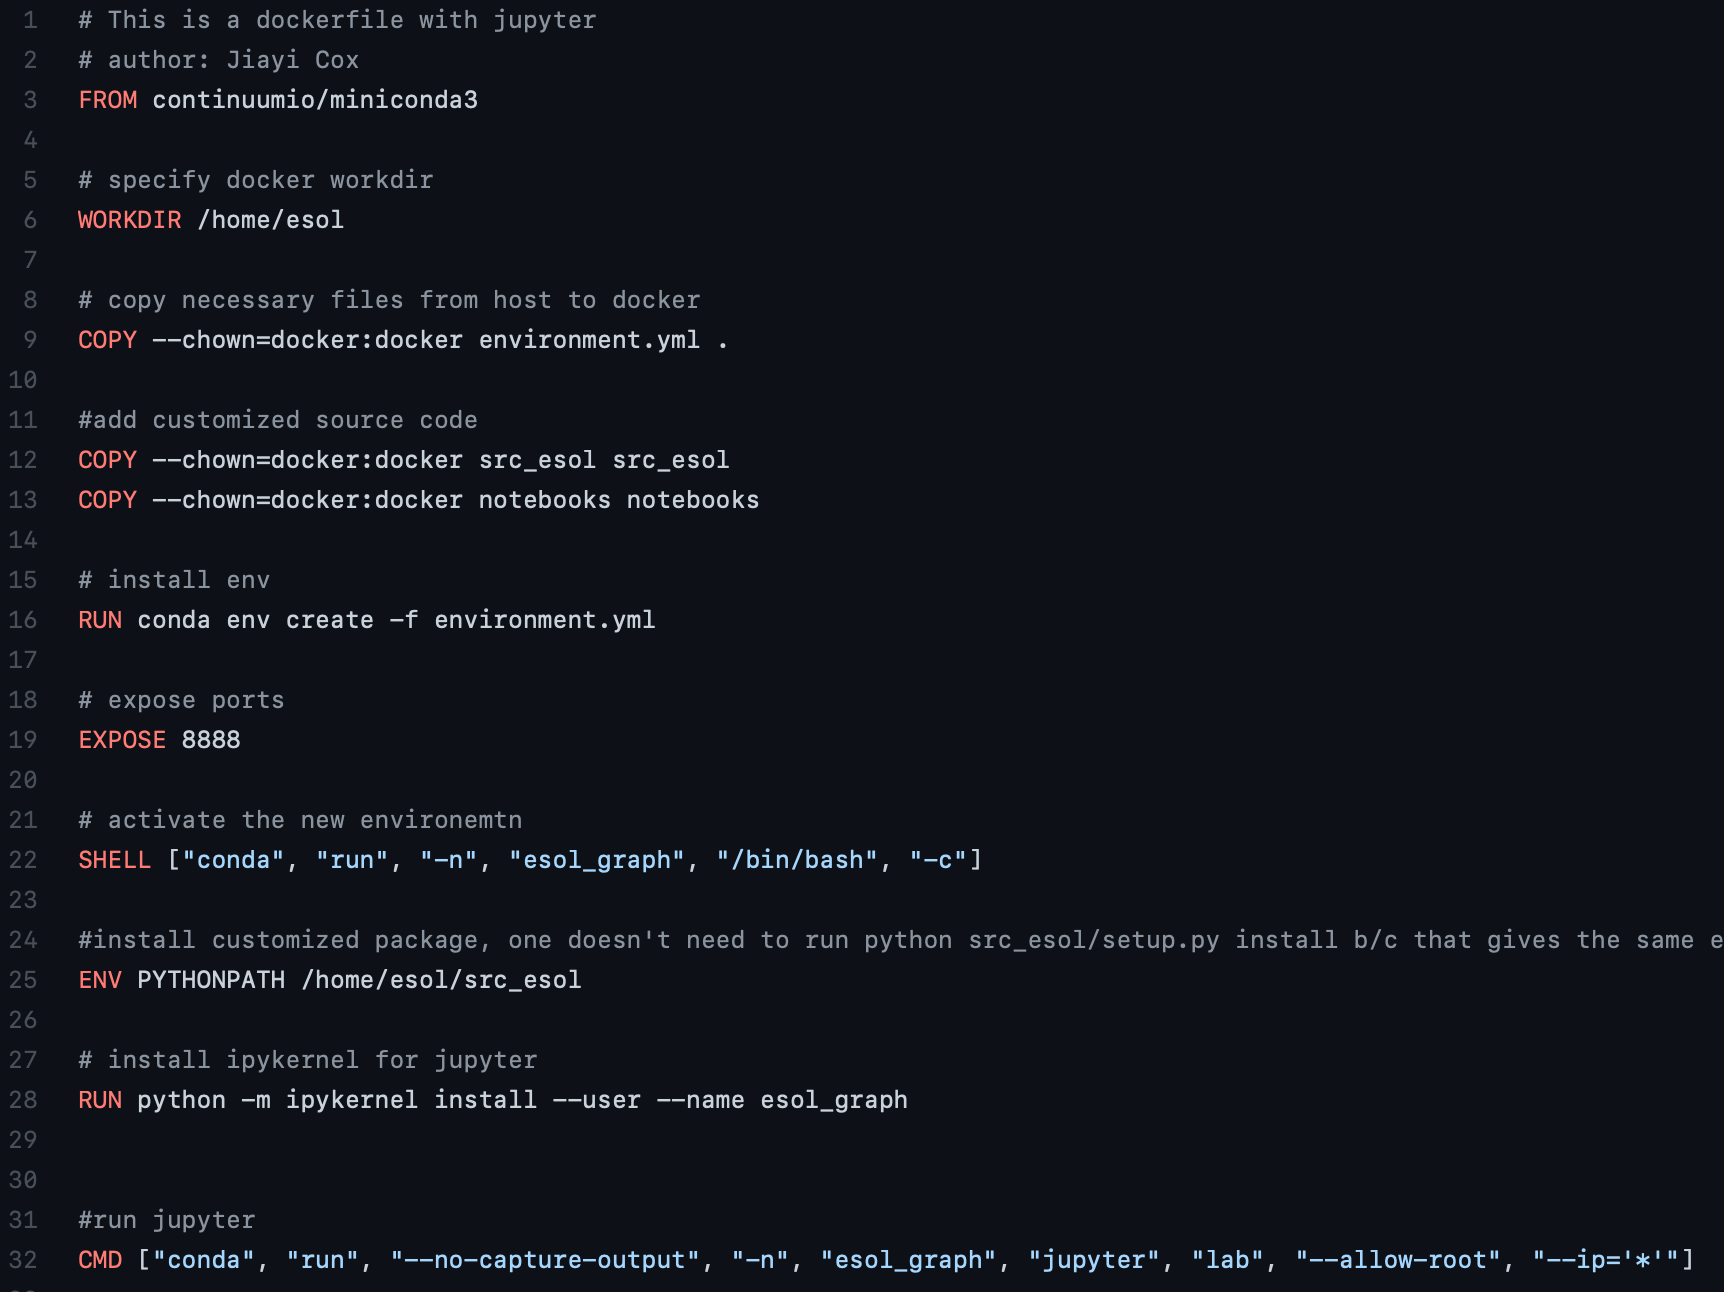
Docker image for (4) is built by
docker build -t esol_graph_jupyter . -f Dockerfile
2. Run Docker container
A docker image is like a software, and a docker container is the tool to use that software.
docker container run -it -p 8888:8888 esol_graph_jupyter
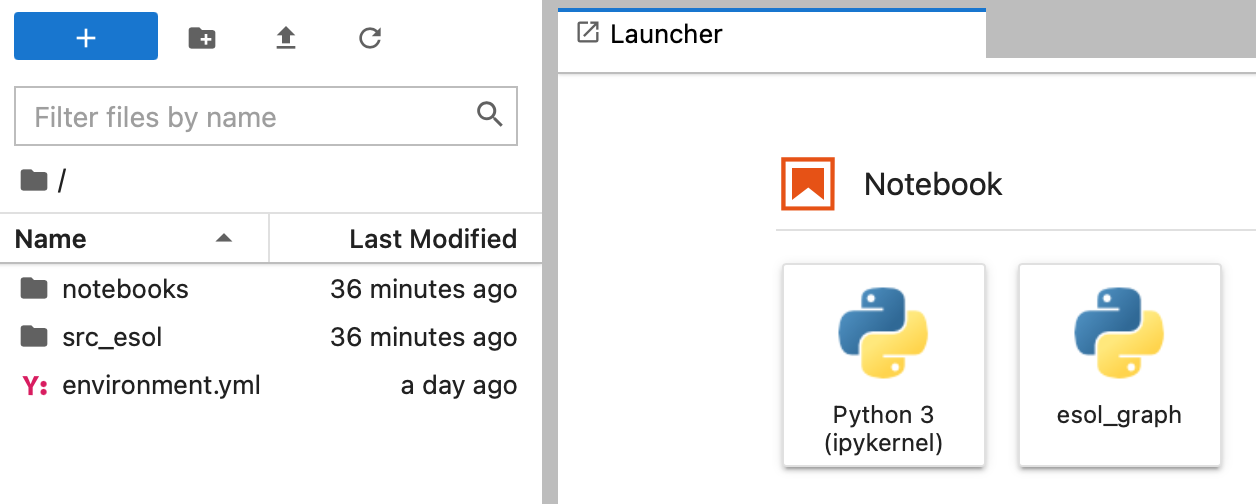
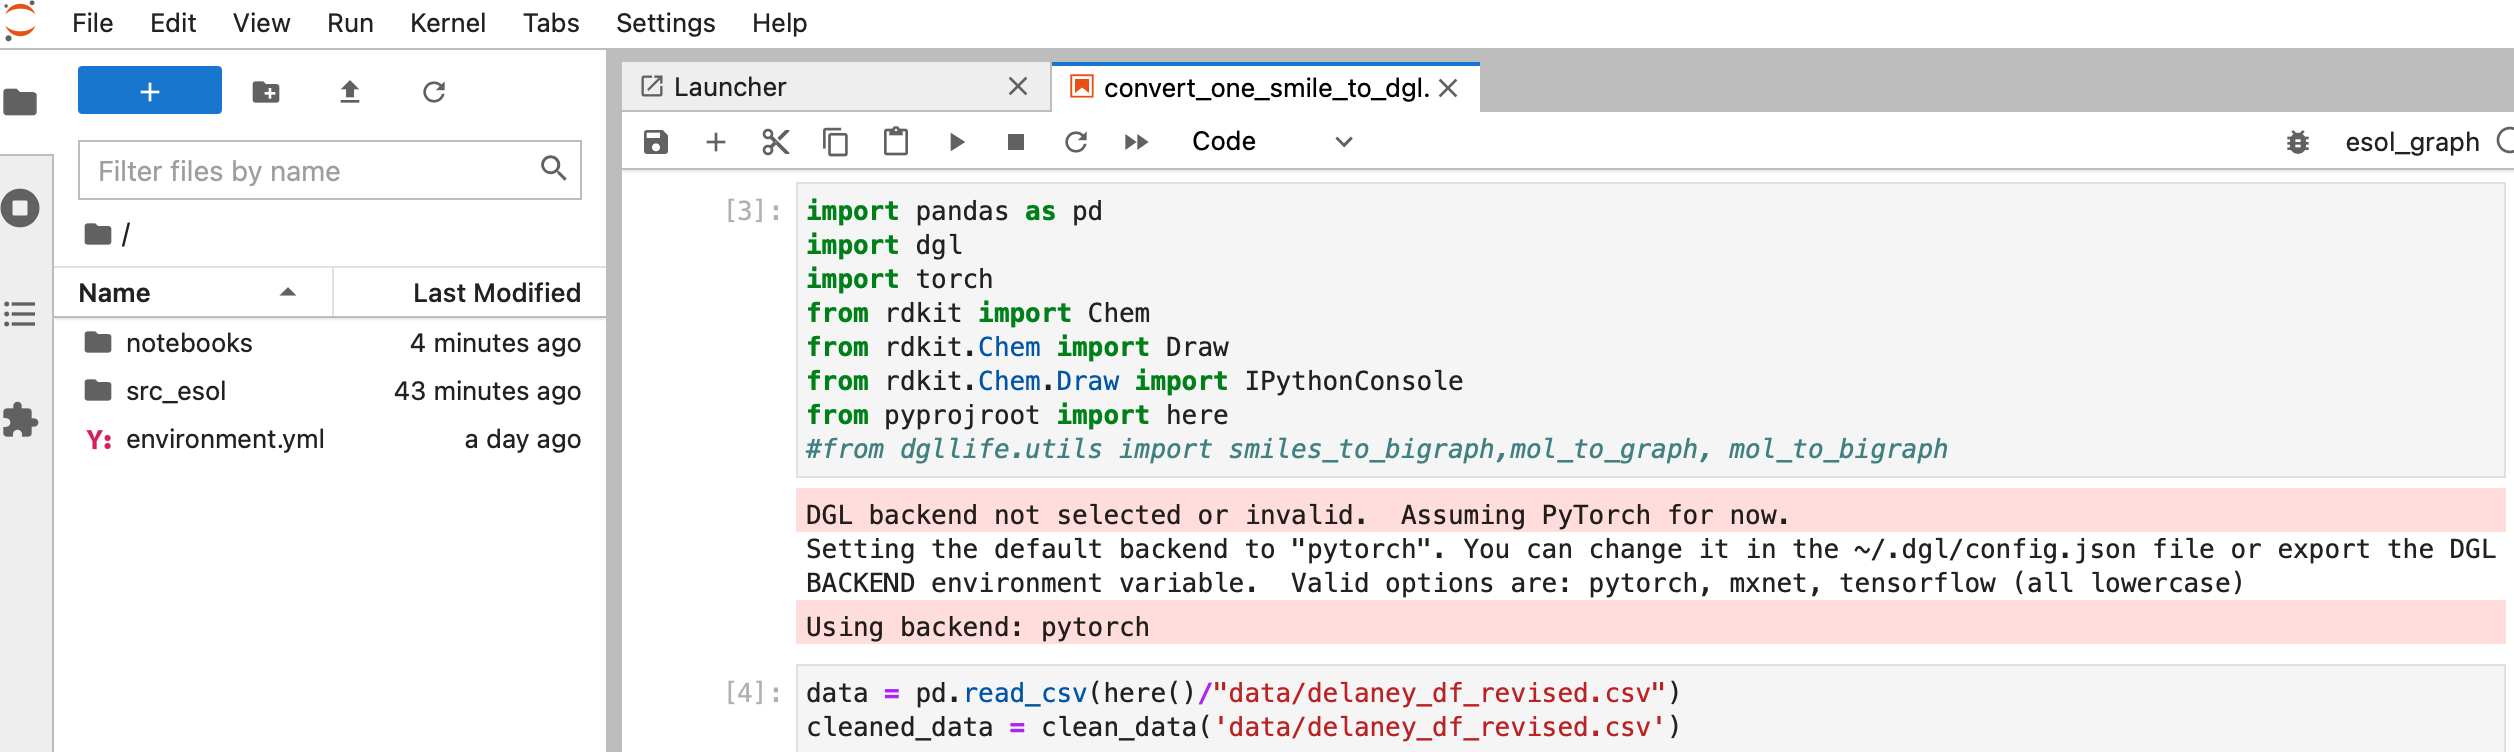
But wait…It still won’t work since Docker doesn’t have the information of the data folder in this example (see left side there is no folder called “data”)
3. Mount data and run Docker container again
To achieve (5), we need to tell Docker: here is the software, here is the data for the software. -v allows users to mount the local data to Docker so docker knows where the data is (in this case).
docker container run -it -p 8888:8888 -v $(pwd):/home/esol esol_graph_jupyter
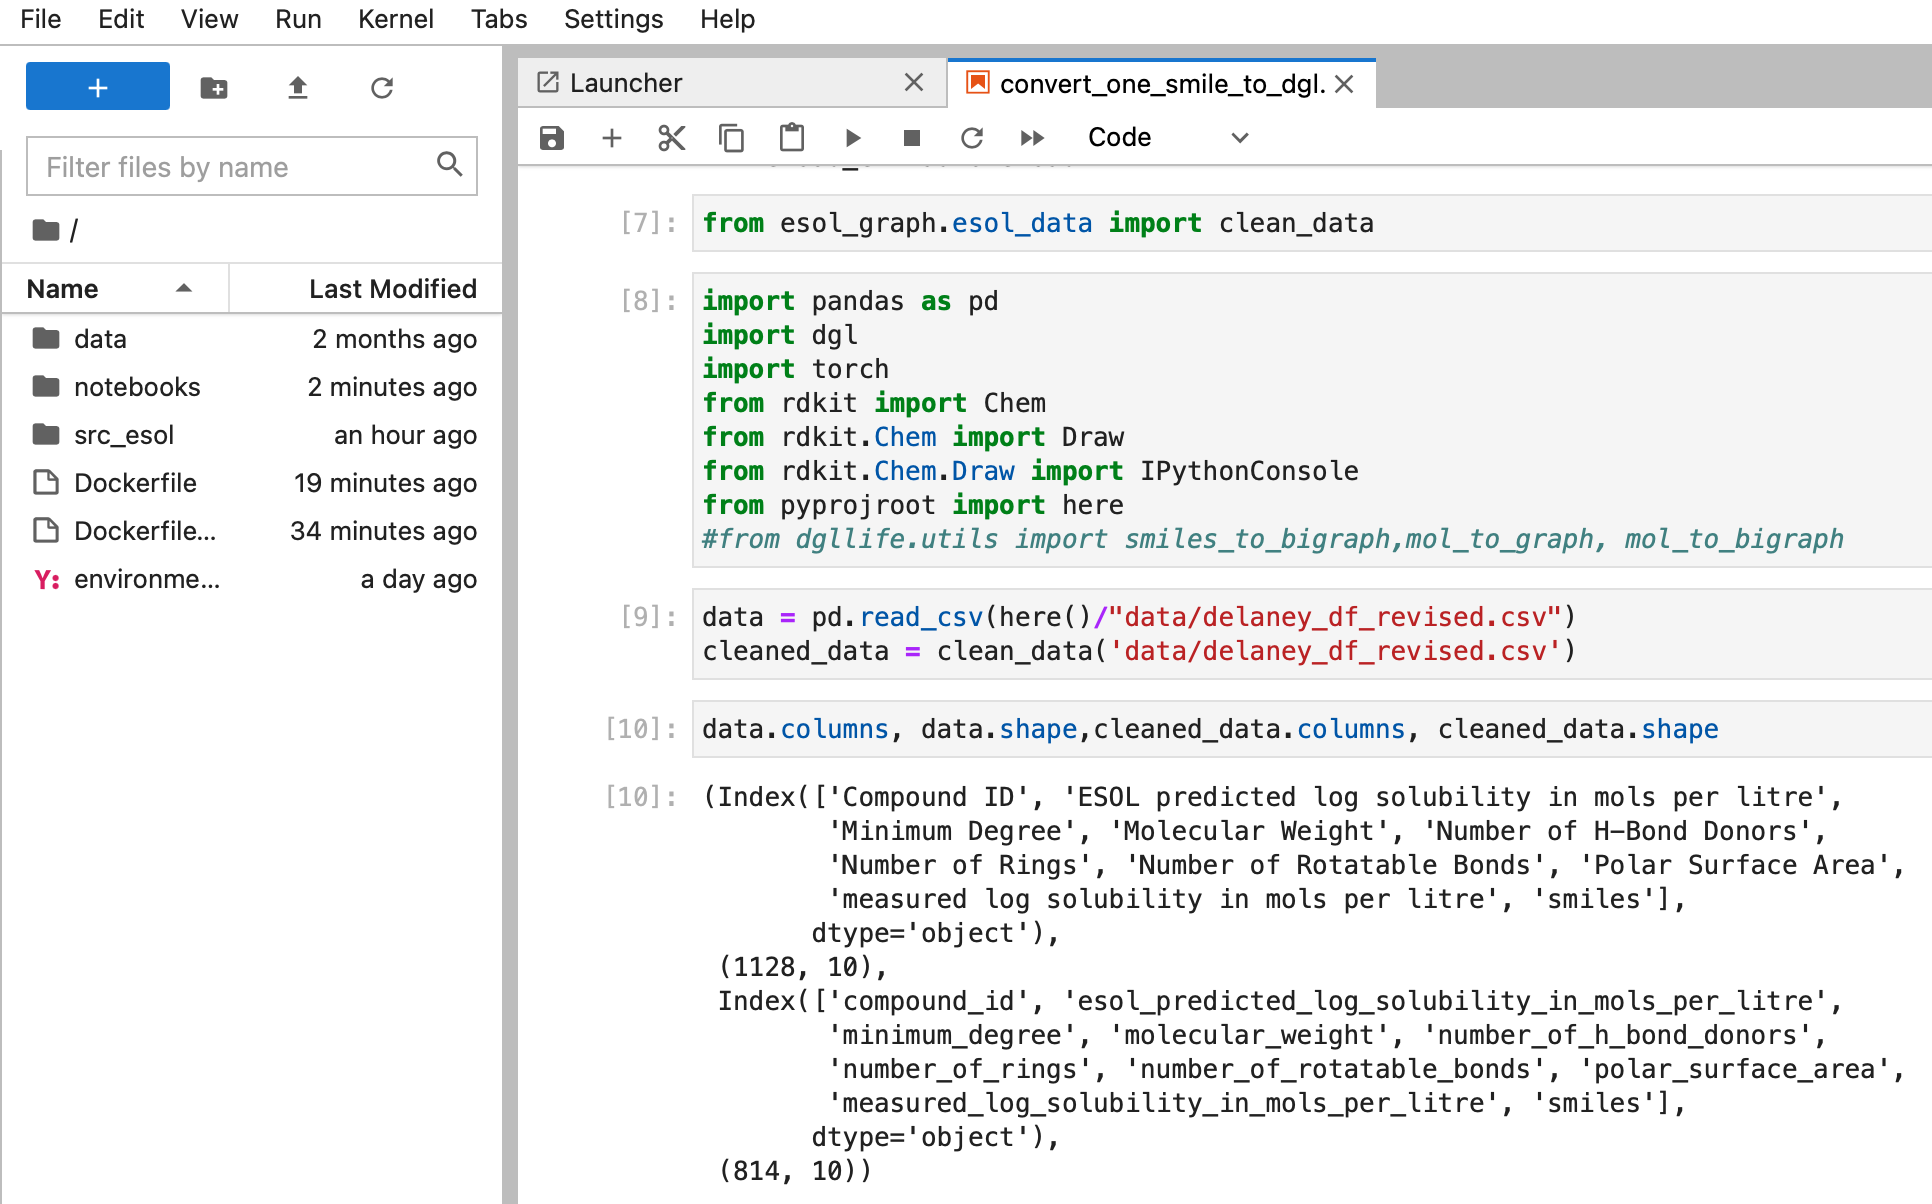
It is working!
Code used for this blog can be found here.